How To Find Molarity From Titration
listenit
Mar 24, 2025 · 6 min read
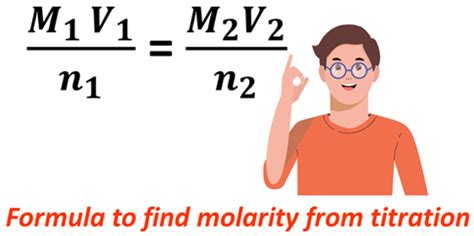
Table of Contents
How to Find Molarity from Titration: A Comprehensive Guide
Titration is a fundamental technique in chemistry used to determine the concentration of an unknown solution, often expressed as molarity. Understanding how to perform a titration and calculate the molarity from the obtained data is crucial for many chemical analyses. This comprehensive guide will walk you through the entire process, from understanding the underlying principles to mastering the calculations.
Understanding the Principles of Titration
Titration is a volumetric analysis technique where a solution of known concentration (the titrant) is gradually added to a solution of unknown concentration (the analyte) until the reaction between them is complete. This point of completion, known as the equivalence point, is usually indicated by a change in color using an indicator. The volume of titrant required to reach the equivalence point is used to calculate the concentration of the analyte.
The key to successful titration lies in understanding the stoichiometry of the reaction between the titrant and the analyte. This stoichiometry is represented by the balanced chemical equation. For example, a common titration involves a strong acid reacting with a strong base:
HCl (aq) + NaOH (aq) → NaCl (aq) + H₂O (l)
This equation shows a 1:1 mole ratio between HCl and NaOH. This ratio is critical for the molarity calculations.
Types of Titration
Several types of titrations exist, each suited to different types of analytes and titrants:
1. Acid-Base Titration:
This is the most common type of titration, involving the reaction between an acid and a base. The equivalence point is often determined using indicators such as phenolphthalein (colorless in acidic solutions, pink in basic solutions) or methyl orange (red in acidic solutions, yellow in basic solutions). The choice of indicator depends on the pH at the equivalence point.
2. Redox Titration:
These titrations involve the transfer of electrons between the titrant and the analyte. The equivalence point is often determined using a redox indicator that changes color at a specific redox potential. Examples include potassium permanganate titrations and iodine titrations.
3. Precipitation Titration:
These titrations involve the formation of a precipitate as the titrant reacts with the analyte. The equivalence point is often determined using a visual indicator or by monitoring the change in conductivity of the solution. An example is the titration of silver ions with chloride ions.
4. Complexometric Titration:
These titrations involve the formation of a complex ion between the titrant and the analyte. The equivalence point is often determined using a metal-ion indicator that changes color when the metal ion is complexed. An example is the EDTA titration of metal ions.
Materials and Equipment Required for Titration
Performing a titration requires specific equipment and materials:
- Burette: A graduated glass tube used to deliver the titrant precisely.
- Pipette: Used to accurately measure a known volume of the analyte.
- Conical Flask: The flask in which the titration is performed.
- Beaker: Used for holding solutions.
- Indicator: A substance that changes color at or near the equivalence point.
- Magnetic Stirrer and Stir Bar: To ensure thorough mixing during the titration.
- Wash Bottle: To rinse equipment.
- Analyte Solution: The solution of unknown concentration.
- Titrant Solution: The solution of known concentration.
Step-by-Step Procedure for Titration
-
Preparation: Prepare the burette by rinsing it with the titrant solution. Fill the burette with the titrant, ensuring no air bubbles are present. Record the initial burette reading.
-
Pipetting the Analyte: Using a pipette, accurately transfer a known volume of the analyte solution into a conical flask.
-
Adding Indicator: Add a few drops of the appropriate indicator to the analyte solution.
-
Titration: Slowly add the titrant from the burette to the analyte solution while constantly stirring. The stirring can be manual or using a magnetic stirrer. Watch carefully for the color change indicating the equivalence point.
-
Equivalence Point Determination: The equivalence point is reached when the indicator changes color permanently. Record the final burette reading.
-
Calculations: Calculate the volume of titrant used by subtracting the initial burette reading from the final burette reading. Use this volume and the known concentration of the titrant to calculate the molarity of the analyte.
Calculating Molarity from Titration Data
The calculation of the molarity of the analyte depends on the stoichiometry of the reaction. The general formula is:
M₁V₁n₁ = M₂V₂n₂
Where:
- M₁ = Molarity of the titrant (known)
- V₁ = Volume of the titrant used (in Liters)
- n₁ = Number of moles of titrant reacting per mole of analyte (from the balanced equation)
- M₂ = Molarity of the analyte (unknown)
- V₂ = Volume of the analyte used (in Liters)
- n₂ = Number of moles of analyte reacting per mole of titrant (from the balanced equation)
Example:
Let's say you titrated 25.00 mL of an unknown NaOH solution with 0.100 M HCl solution. It took 20.00 mL of HCl to reach the equivalence point. The balanced equation is:
HCl (aq) + NaOH (aq) → NaCl (aq) + H₂O (l)
In this case, n₁ = 1 and n₂ = 1 (1:1 mole ratio).
We can rearrange the formula to solve for M₂ (molarity of NaOH):
M₂ = (M₁V₁n₁)/(V₂n₂)
M₂ = (0.100 M * 0.0200 L * 1)/(0.0250 L * 1) = 0.0800 M
Therefore, the molarity of the NaOH solution is 0.0800 M.
Sources of Error in Titration
Several sources of error can affect the accuracy of titration results:
- Parallax error: Incorrect reading of the burette due to eye level not being aligned with the meniscus.
- Indicator error: The indicator may change color slightly before or after the true equivalence point.
- Improper mixing: Incomplete mixing can lead to inaccurate results.
- Impurities in the solutions: Impurities in either the titrant or analyte can affect the results.
- Temperature variations: Temperature changes can affect the volume and concentration of solutions.
Minimizing these errors requires careful technique and attention to detail. Repeating the titration several times and averaging the results can improve accuracy.
Advanced Titration Techniques and Applications
Beyond the basic procedures outlined above, several advanced techniques exist for more complex titrations:
- Potentiometric Titration: Uses an electrode to monitor the potential of the solution during titration, providing a more precise determination of the equivalence point.
- Spectrophotometric Titration: Uses a spectrophotometer to monitor the absorbance of the solution during titration, providing a more sensitive detection of the equivalence point.
- Coulometric Titration: Generates the titrant electrochemically, eliminating the need for a standard titrant solution.
Titration is widely used in many applications, including:
- Determining the acidity or basicity of solutions: Essential in various industrial processes and environmental monitoring.
- Analyzing food and beverages: Determining the concentration of acids, bases, and other components.
- Pharmaceutical analysis: Ensuring the purity and concentration of drugs.
- Clinical chemistry: Measuring the concentration of various substances in biological fluids.
- Environmental monitoring: Determining the concentration of pollutants in water and soil samples.
Conclusion
Titration is a powerful technique for determining the concentration of unknown solutions. By carefully following the procedures and understanding the principles involved, accurate and reliable results can be obtained. Mastering titration is a fundamental skill for anyone working in chemistry or a related field. Through consistent practice and attention to detail, you can confidently utilize this technique for a wide variety of applications. Remember to always prioritize safety when handling chemicals and equipment in the laboratory. Consult relevant safety data sheets (SDS) before conducting any experiment.
Latest Posts
Latest Posts
-
What Is The Correct Formula For Calcium Oxide
Mar 28, 2025
-
What Is The Si Base Unit Of Length
Mar 28, 2025
-
What Is The Oxidation State Of Each Element In Coh2
Mar 28, 2025
-
How Many Valence Electrons Are In Boron
Mar 28, 2025
-
Most Reactive Metal On The Periodic Table
Mar 28, 2025
Related Post
Thank you for visiting our website which covers about How To Find Molarity From Titration . We hope the information provided has been useful to you. Feel free to contact us if you have any questions or need further assistance. See you next time and don't miss to bookmark.
